Did you know a single spider plant can make up to 1,000 baby plants? These baby plants are called spiderettes. Pretty amazing, right? But, to keep your spider plant healthy and vibrant, you must trim it often. In this guide, you’ll learn how to trim, shape, and care for your spider plants.
Trimming your plant isn’t just to make it look good. It’s also a health check-up for your plant. Snipping away the old and yellowed leaves lets it start fresh. This helps your plant grow lush and vibrant new leaves. Trimming keeps its shape pleasing to the eye, too. This stops it from looking messy. Instead of a night out, it looks like a happy, healthy plant.
Key Takeaways
-
Trimming spider plants is crucial for lush growth and looks.
-
Pruning removes old leaves, making room for vibrant new growth.
-
It maintains the plant’s shape and keeps it tidy.
-
How and when you trim are key to success.
-
Remember, watering, lighting, and pest control are musts for the plant’s health.
Benefits of Pruning Spider Plants
Pruning your Spider Plant does more than keep it pretty. Snipping away old leaves is like a health check. It starts new, lush growth. This fresh start wakes your plant up, ready for new shoots.
Promoting New Growth
By trimming, your plant looks neat and stays happy. Pruning helps it grow denser and keeps its shape in check.
Maintaining Plant Shape
Those baby plants hanging from your Spider Plant are sweet. But pruned plants grow denser and are happier. Cut them back to keep the main plant strong and to make more plants.
Preventing Legginess
Pruning helps your plant look fuller and more beautiful. Without trimming, the babies can get out of control. But if you trim, the main plant won’t get weak, and you can make more plants.
Managing Reproduction
Those spiderettes are charming, but they can take over. Trimming helps the main plant stay strong. It also lets you grow new plants from the cuttings.
Spiderette Removal
Those baby plants hanging from your main plant are adorable. But giving them a trim keeps your plant healthy. It also lets you grow more plants from the cuttings.
When to Trim Spider Plants
It’s crucial to know when to trim your Spider Plant. The best time is in spring and early summer. This is when your plant is most lively.
Identifying the Right Time
Look for new shoots to know when it needs a trim. Trimming in the winter can hurt your plant. Winter is a quiet time.
Growth Stage Matters
New leaves mean it’s time to prune. If you cut too early, you may lose flowers. If you cut too late, you miss their fast growth.
Where to Trim Spider Plants
Keep your spider plant beautiful by snipping in the right places. Cut off brown or yellow leaves, damaged parts, old flower stems, and baby plants. A little trim here and there boosts the plant’s health and look.
Brown or Yellowing Leaves
Snip away leaves that are brown or yellow. These often happen because the leaves are old or the plant isn’t in a good spot. Use sharp scissors to cut these off at the base. Your plant will use this energy for fresh, green growth.
Damaged Foliage
Find leaves that look torn or have holes. This damage might be from bugs or being bumped. Removing these leaves stops diseases and makes your plant look better. A neat plant is a happy plant.
Spent Flower Stems
After the plant’s flowers fade, trim the stems. This helps the plant focus on growing new leaves. Your plant will soon look lush and full.
Spiderettes
Small baby plants, called spiderettes, need to be managed. Cut them off near the base. This keeps your plant strong and its shape full.
Techniques for Trimming Spider Plants
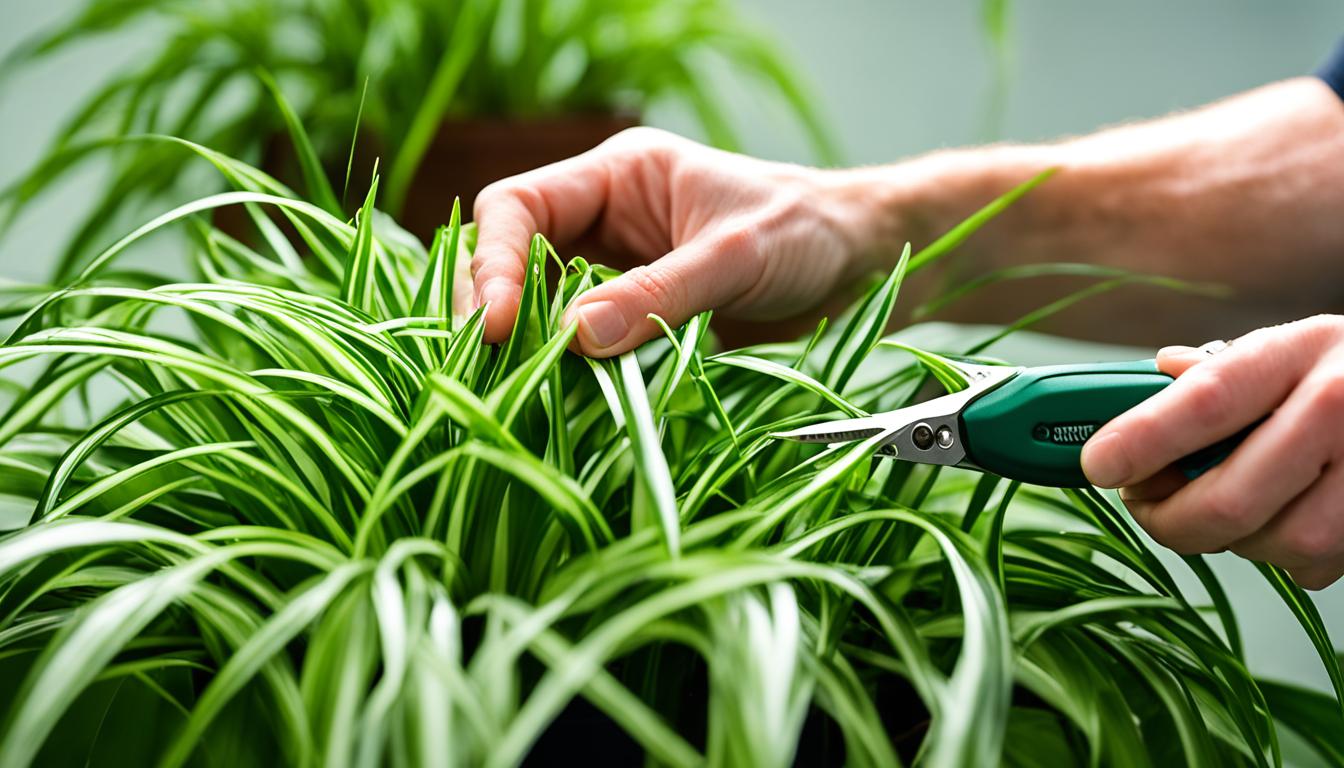
Mastering spider plant trimming techniques takes skill. You need a sharp pair of scissors or shears. This ensures your cuts are clean and precise. Always cut at a 45-degree angle just above a leaf node. This stops water from gathering, which can cause diseases.
Thicker spider plant stems need to be cut with pruning shears. For finer work, use sharp scissors. Pregame with a rub of alcohol on the blades to avoid spreading germs. Ditch the rusty scissors from your drawer. Your spider plant deserves only the best.
Caring for spider plant grooming means handling spiderettes with care. To grow more plants, cut the stem right at the base of the spiderette. But if you want a full-looking plant, remove these babies.
Cutting your plant right is crucial for spider plant pruning techniques. It helps the plant grow well and keeps pests and diseases away. With the right spider plant trimming tools and proper care, your spider plant will thrive.
Trimming Spider Plants
Trimming your Spider Plant is easy, but needs care. We’ll show you how to make your plant happy and healthy.
Selecting the Right Tool
Use sharp scissors or pruning shears. Clean them with rubbing alcohol first to keep your plant safe. Never pick up old, rusty tools. They can hurt your plant. Use scissors for small jobs and shears for thick stems.
Making the Cut
Cut at a 45-degree angle. This makes the plant heal faster and stops water from causing problems.
Pruning Spiderettes
Little spiderettes need care too. Snip them if you want to help your plant grow strong. Otherwise, let them grow beautifully.
Root and Shoot
Is your plant’s root too tight? Trim it carefully, but avoid the big roots. Your plant might be sad for a while, and that’s normal.
Aftercare
After trimming, support your plant. Water it, place it in soft light, and say nice things to it.
Common Mistakes to Avoid
When you prune your Spider Plant, do it gently. Avoiding common mistakes is key for its health and beauty. We will guide you through these pitfalls for a thriving, lush Spider Plant.
Cutting Too Close to the Base
Don’t cut your Spider Plant too close to its base. This can hurt the central crown. Leave some space to keep it safe and allow for healthy regrowth.
Over-Pruning
Remember, more isn’t always better. Don’t over-prune. Removing too many leaves can stress your plant. Instead, pluck only dead or yellow leaves and extra spiders.
Using Dull Tools
Dull scissors are not good for your plant. They can crush the leaves, letting in pests and diseases. Keep your tools sharp for clean cuts and quick healing.
Ignoring the Roots
Don’t just focus on the leaves; the roots are essential too. Sometimes, roots need trimming when repotting. However, it’s a bit like trimming your hair; don’t overdo it.
Forgetting Post-Pruning Care
Your plant needs extra care after pruning. Make sure it gets enough water and light. Also, give it a little mist now and then; Spider Plants love humidity.
Avoid these mistakes to keep your Spider Plant healthy and vibrant. It will thank you with beautiful, green growth.
Maintenance After Pruning
After cutting back your Spider Plant, taking good care of it is very important. This helps it grow strong and healthy again. We will look at what your plant needs after pruning to make sure it thrives.
Post-Trimming Care Tips
| Care Aspect | Recommendation |
| Watering | Water thoroughly and allow soil to dry slightly |
| Light | Bright, indirect light |
| Fertilizing | Every 4–6 weeks during growing season |
Watering Wisdom
Don’t water too much—that’s a big mistake. Feel the top of the soil before watering. If it’s dry, your plant needs water. Use filtered water to keep your plant safe from harmful substances like fluoride and salt.
Light and Temperature
Put your Spider Plant where it gets good, but indirect, sunlight. Strong sunlight can harm its leaves. Remember, it likes warmth but not cold drafts.
Fertilizing Finesse
Wait a little before using fertilizer. Let your plant adjust first. Then, you can use a slow-release kind every few weeks in spring and early summer. This helps without shocking the plant.
Pest Patrol
Watch out for bugs like spider mites. If you see any pests, deal with them quickly.
Rotation and Cleaning
Clean leaves help your plant make food better. Light helps plants grow, so move your Spider Plant around occasionally. Use a soft cloth to keep the leaves clean and shiny.
Conclusion
Keep your spider plant looking perfect with tailored reminders. This ensures you cut it at the best time for growth. Regular spider plant pruning makes your plant look lively. It removes old or damaged leaves, letting new ones grow. This gives you more green, more new shoots, and more of that special Spider Plant look.
Shape your plant so it looks nice and avoid it growing too tall. By doing this, you also help it make new plants. All you need is the right timing and some skillful cutting. With the smart use of spider plant shaping and spider plant grooming methods, your spider plant will stay stunning. This way, it continues to be the lovely, healthy plant you enjoy.
<div class="quiz-container">
  <h1>✂️ Trimming Spider Plants: A Simple Guide for Lush Growth ✂️</h1>
  <form id="spider-plant-trimming-quiz">
    <div class="question">
      <h2>1. When is the best time to trim a spider plant?</h2>
      <label>
        <input type="radio" name="q1" value="a"> Spring
      </label>
      <label>
        <input type="radio" name="q1" value="b"> Summer ☀️
      </label>
      <label>
        <input type="radio" name="q1" value="c"> Fall
      </label>
      <label>
        <input type="radio" name="q1" value="d"> Winter ❄️
      </label>
    </div>
    <div class="question">
      <h2>2. What tool should you use to trim a spider plant?</h2>
      <label>
        <input type="radio" name="q2" value="a"> Scissors ✂️
      </label>
      <label>
        <input type="radio" name="q2" value="b"> Pruning shears
      </label>
      <label>
        <input type="radio" name="q2" value="c"> Kitchen knife
      </label>
      <label>
        <input type="radio" name="q2" value="d"> Hands
      </label>
    </div>
    <div class="question">
      <h2>3. Which parts of the spider plant should be trimmed?</h2>
      <label>
        <input type="radio" name="q3" value="a"> Healthy green leaves
      </label>
      <label>
        <input type="radio" name="q3" value="b"> Brown or yellow leaves
      </label>
      <label>
        <input type="radio" name="q3" value="c"> Flower stalks
      </label>
      <label>
        <input type="radio" name="q3" value="d"> All of the above
      </label>
    </div>
    <div class="question">
      <h2>4. How can you promote healthy growth after trimming?</h2>
      <label>
        <input type="radio" name="q4" value="a"> Water the plant immediately
      </label>
      <label>
        <input type="radio" name="q4" value="b"> Place it in direct sunlight ☀️
      </label>
      <label>
        <input type="radio" name="q4" value="c"> Fertilize the soil
      </label>
      <label>
        <input type="radio" name="q4" value="d"> Move to a shaded area
      </label>
    </div>
    <div class="question">
      <h2>5. How often should you trim a spider plant?</h2>
      <label>
        <input type="radio" name="q5" value="a"> Once a month
      </label>
      <label>
        <input type="radio" name="q5" value="b"> Every 6 months  ️
      </label>
      <label>
        <input type="radio" name="q5" value="c"> Once a year
      </label>
      <label>
        <input type="radio" name="q5" value="d"> Only when necessary
      </label>
    </div>
    <button type="button" onclick="checkAnswers()">Submit</button>
  </form>
  <div id="results"></div>
</div>

<style>
  .quiz-container {
    font-family: Arial, sans-serif;
    max-width: 600px;
    margin: auto;
    padding: 20px;
    border: 2px solid #4CAF50;
    border-radius: 10px;
    background-color: #f9f9f9;
  }
  h1 {
    text-align: center;
    color: #4CAF50;
  }
  .question {
    margin-bottom: 20px;
  }
  label {
    display: block;
    margin: 5px 0;
  }
  button {
    display: block;
    width: 100%;
    padding: 10px;
    background-color: #4CAF50;
    color: white;
    border: none;
    border-radius: 5px;
    cursor: pointer;
  }
  button:hover {
    background-color: #45a049;
  }
  #results {
    margin-top: 20px;
    text-align: center;
  }
</style>

<script>
  function checkAnswers() {
    const answers = {
      q1: 'a',
      q2: 'b',
      q3: 'b',
      q4: 'c',
      q5: 'd'
    };
    let score = 0;
    const form = document.getElementById('spider-plant-trimming-quiz');
    const results = document.getElementById('results');
    const formData = new FormData(form);
    formData.forEach((value, key) => {
      if (value === answers[key]) {
        score++;
      }
    });
    results.innerHTML = `<h2>Your Score: ${score}/5</h2>`;
    if (score === 5) {
      results.innerHTML += `<p>  Excellent! You are a Spider Plant trimming expert!  </p>`;
    } else if (score >= 3) {
      results.innerHTML += `<p>  Good job! Keep up the great work in caring for your plants!  </p>`;
    } else {
      results.innerHTML += `<p>  Keep learning and your Spider Plants will thrive!  </p>`;
    }
  }
</script>
✂️ Trimming Spider Plants: A Simple Guide for Lush Growth ✂️
Relevant Articles:
Source Links
trimming-spider-plants


